Cornmeal & Honey Cake with Blueberry Compote & Candied Cornflakes

This site uses affiliate links. We may earn a commission if you purchase through our links at no extra cost to you.

I love having a few go-to desserts, you know the ones that your friends always ask you to make, the ones that you know like the back of your hand and can whip up to have people over or bring to a bbq. This cornmeal and honey cake with blueberry compote has that kind of potential.

Homemade Churro Ice Cream

This site uses affiliate links. We may earn a commission if you purchase through our links at no extra cost to you.

Get ready to WOW your guests! This churro ice cream was such a HIT this past weekend. It starts with a traditional custard infused with cinnamon and ends with store bought churros served warm right on top. It is chef’s kiss!

Churro Ice Cream

Topped with freshly baked churros for a delicious ice cream dessert.
Prep Time 8 hours
Cook Time 30 minutes
Course Dessert
Servings 2 pints

Equipment

  • Ice cream maker or ice cream maker attachment

Ingredients
  

  • 2 c heavy cream, divided
  • 1 c whole milk
  • 3/4 c granulated sugar
  • pinch of salt
  • 6 large egg yolks
  • 1 tsp pure vanilla extract
  • 1 tbsp ground cinnamon
  • caramel sauce
  • 1 box of frozen churros see notes

Instructions
 

  • Ensure your ice cream maker or ice cream maker attachment is prepared ahead of time before beginning this recipe.
  • In a sauce pan, combine 1 cup of heavy cream, whole milk, sugar and salt over medium heat.
  • Stir until sugar is dissolved and mixture is heated through.
  • Add cinnamon and vanilla, set aside.
  • In a medium bowl, whisk the egg yolks.
  • Add the milk, sugar and cinnamon mixture to the whisked eggs, continuing to whisk as you add the warm milk mixture. Pour all of this back into the sauce pan.
  • Stir constantly over medium heat, scraping the bottom as you go, careful not to scramble the eggs. Cook until the mixture thickens up and can coat the back of a spoon. Remove from the heat.
  • In a clean bowl, add remaining 1 cup of heavy cream. Through a fine mesh strainer, pour the milk and egg mixture into the bowl and stir into the cream.
  • Cover with plastic and chill thoroughly, at least 2 hours.
  • Prepare your ice cream maker or ice cream maker attachment. Churn according to your manufacturer's instructions.
  • Once ready, put in a freezer safe container (I use disposable pints from Amazon), layering with the caramel sauce; freeze at least 6 hours.

Notes

Please allow ample time to prepare your ice cream maker or ice cream maker attachment according to the manufacturer’s instructions. 
If you can make this a day or two ahead, it will give you plenty of time to thoroughly freeze your ice cream. I made and served mine in the same day, so it was a bit soft, but still delicious! 
You can definitely make fresh churros, however, I bought mine from the freezer aisle! They come in a box of 8. Noting that this recipe gave me 2 pints of ice cream. I used one scoop of ice cream in each bowl, which used one full pint + 1 scoop. 

Our Cinco de Mayo Menu & Tablescape Details

This site uses affiliate links. We may earn a commission if you purchase through our links at no extra cost to you.

This past weekend, we hosted a small cinco de mayo-inspired dinner party. The meal came together so beautifully and I really loved the details in the tablescape! It was simple, but felt elevated and not cheesy.

One of my favorite details were the tomatillos on each setting! I found these Hearth & Hand plates (dinner size, salad size) from Target and paired with some napkins from the H&H collection last year. I loved the way the blue combined with the terracotta hue dishes. Here is a similar option from this season’s collection and another, as well as sets from Williams Sonoma and Anthropologie I love.

And for the menu!

Appetizer: Blue chips with pineapple salsa, restaurant-style salsa, and a dressed up store bought guacamole

Mains:

Marinated seared flank steak and lime cilantro shrimp tacos with various toppings

Black bean salad and a salad with sliced tomatoes, avocado, pickled onions, salt and olive oil

Pan con Tomate

Arroz con verde

Dessert: homemade churro ice cream topped with freshly baked churros

Simple Black Bean Salad for an Easy Side Dish

This site uses affiliate links. We may earn a commission if you purchase through our links at no extra cost to you.

Whenever we’re hosting friends or family, I am always super focused on the side dishes. I think it’s what makes the meal really interesting, both visually and flavor-wise, and to be honest, surround me with 5 different salads and I’m a happy camper.

So I’m sharing this with you, but it’s definitely a non-recipe recipe. Measure with your heart, flavor it to your liking! It’s a really lovely salad and makes the table so colorful!

I grilled the corn inside over medium heat and then just sliced the charred kernels off. Added two cans of black beans, a bunch of quartered grape tomatoes, red onion, pickled red onion, cojita, cilantro, lime juice, elote seasoning and scallions, with a dash of red wine vinegar and olive oil and lots of salt. Avocado would be another great addition!

Non-Recipe Recipe for Black Bean Salad

We're measuring with our hearts and flavoring with taste buds on this one!

Equipment

  • grill or grill pan

Ingredients
  

  • 2 ears of corn, charred
  • 2 cans black beans, drained and rinsed
  • 1-2 cups grape or cherry tomatoes, halved or quartered
  • 2 scallions, thinly sliced
  • 1/4 c cojita, crumbled
  • 1/8 c sliced pickled onions
  • 1/8 c diced red onion
  • 1/8 c cilantro (leave it out if you don't like it!)
  • 2 limes, juiced
  • 1-2 tsp apple cider vinegar
  • 1-2 tbsp extra virgin olive oil
  • 1 tbsp elote seasoning
  • salt, pepper to taste

Instructions
 

  • Combine all ingredients and taste for seasoning and lime juice; adjust accordingly.
  • Garnish with more charred corn, cojita, pickled onions and cilantro (if using).

How to Upgrade Store Bought Guacamole

This site uses affiliate links. We may earn a commission if you purchase through our links at no extra cost to you.

Store bought is always fine! But sometimes, we can make it a little better. Guacamole is definitely one of those, especially when you can’t get your hands on enough ripe avocados to make it all from scratch yourself.

Jump to Recipe

First, you’ll start with your store bought base; then you’ll mash up some just ripe avocados (also fully ripe, totally fine). To that, you add salt, chopped tomatoes, red onion, cilantro (if you like it, if you don’t just skip it), and lime juice. Stir it all together and then add that to your store bought guac. Mix it all together!

And then we dress it up! I added some chopped onion, pickled onion, cilantro, charred corn and cojita to the top. It was SUCH a hit!

How to Dress Up Store Bought Guacamole

Course Appetizer

Ingredients
  

  • 2 just ripe or ripe avocados
  • 1/4 c chopped tomatoes
  • 1/8 c chopped red onion
  • 1/8 c chopped cilantro leave it out if you don't like it!
  • 1/2 lime, juiced
  • salt, to taste
  • 1 container of store bought guacamole
  • for optional garnish: chopped tomatoes, cilantro, pickled onions, cojita, charred corn, more salt

Instructions
 

  • Combine all your ingredients in a medium bowl with your store bought guacamole. Adjust for salt and lime juice.
  • Add optional garnishes and serve!

Pan Con Tomate for a Quick and Easy Appetizer Idea

This site uses affiliate links. We may earn a commission if you purchase through our links at no extra cost to you.

Jump to Recipe

Of all the things I put together for our little cinco de mayo dinner party this weekend, the pan con tomate was one of the favorites! For good reason – the bread is perfectly crunchy without hurting your mouth, the tomatoes are bringing in tomato season, and salty, savory, the olive oil is velvety. Highly recommend. We may or may not have had these two days in a row!

It’s pretty simple to make. I recommend making the tomato mixture ahead and letting it hang out in the fridge for a few hours. Bring it to room temp before serving. You can also make it and enjoy right away, but those flavors really do develop after a bit of time.

I always laugh when Ina says “use the good olive oil!” – like, why are we contemplating anything other than good olive oil? But truly in a simple dish like this, a good quality olive oil is important. I’m a big fan of Graza Drizzle finishing oil – the price is solid and the quality is really wonderful – very flavorful. I get mine at Whole Foods!

Pan con Tomate

Perfect idea for a quick and easy appetizer or side dish.
Cook Time 20 minutes
Course Appetizer
Servings 12 toasts

Ingredients
  

Toasts

  • 12 slices ciabatta bread, about 1" thick
  • 6 tbsp butter (or more based on your preference)
  • salt, to taste

Tomato Mixture

  • 1 large beefsteak tomato
  • 1 large clove of garlic
  • 1-2 tbsp salt, or more, to taste
  • 1 pinch pepper, or more, to taste
  • 1 tbsp good quality extra virgin olive oil, plus more for garnish (optional)
  • finishing salt, like maldon, for garnish, optional

Instructions
 

  • Preheat oven to 400 degrees. Prepare a baking sheet with foil and oil spray.
  • Slice ciabatta and spread 1/2 tbsp of butter on each side (or more. to be honest, I just eyeballed it all).
  • Pop bread into the oven for about 20 minutes, or until bread reaches desired color (I wanted to get that rich, golden color throughout the whole toast).
  • While the bread is in the oven, slice the bottom of your tomato and grate it against a box grater into a bowl.
  • Once done, microplane one large garlic clove into the mixture.
  • Add the olive oil, salt, pepper and stir well to combine. Taste for salt and pepper.
  • Top each piece of bread with about a tbsp of the tomato mixture, top with some crunchy salt and a little more olive oil for garnish.
  • See notes about making this ahead.

Notes

If you want to make this ahead, assemble the tomato mixture the day or a few hours before and cover and place in the fridge. The tomato mixture gets more flavorful the longer it sits. 
You’ll want your tomato mixture to be room temperature, so remove from the fridge when you start heating up the bread. Once the bread is done, top with your now room-temp tomato mixture and a dash more olive oil. Enjoy! 

🍊 Miso Orange Ginger Chicken Thighs

A little salty, a little sweet, a lot of flavor.

There’s something about this dish that just feels right for a cozy dinner. It’s casual enough for a weeknight but flavorful and elegant enough to serve when you’re hosting. The pan sauce is rich and silky with miso, orange juice, and just the right amount of ginger to make it feel warm and alive.

Mother’s Day Gift Guide: Gifts for the Baker

Welcome to the first in this year’s Mother’s Day Gift Guide series! As Mother’s Day approaches, finding the perfect gift for the moms in your life can be a daunting task. But fear not! If your mom loves to bake and whip up delicious treats in the kitchen, I’ve got you covered with this curated gift guide featuring some of my favorite baking essentials sure to make any baking enthusiast mom’s day extra special.

As a fellow baking enthusiast and mom, I understand the joy and fulfillment that comes from creating delicious treats for loved ones. Baking is not just about making food; it’s about creating memories, fostering connections, and spreading joy. That’s why I’ve put together this gift guide, filled with items that I personally love and would be thrilled to receive as a gift.

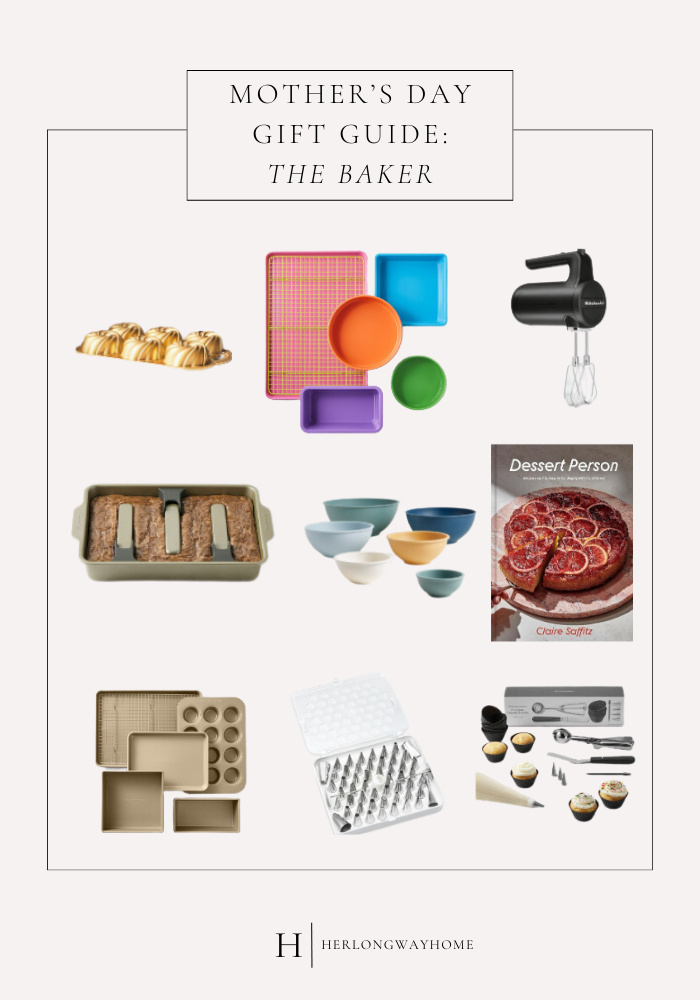
The Perfect Gifts for Baking Moms

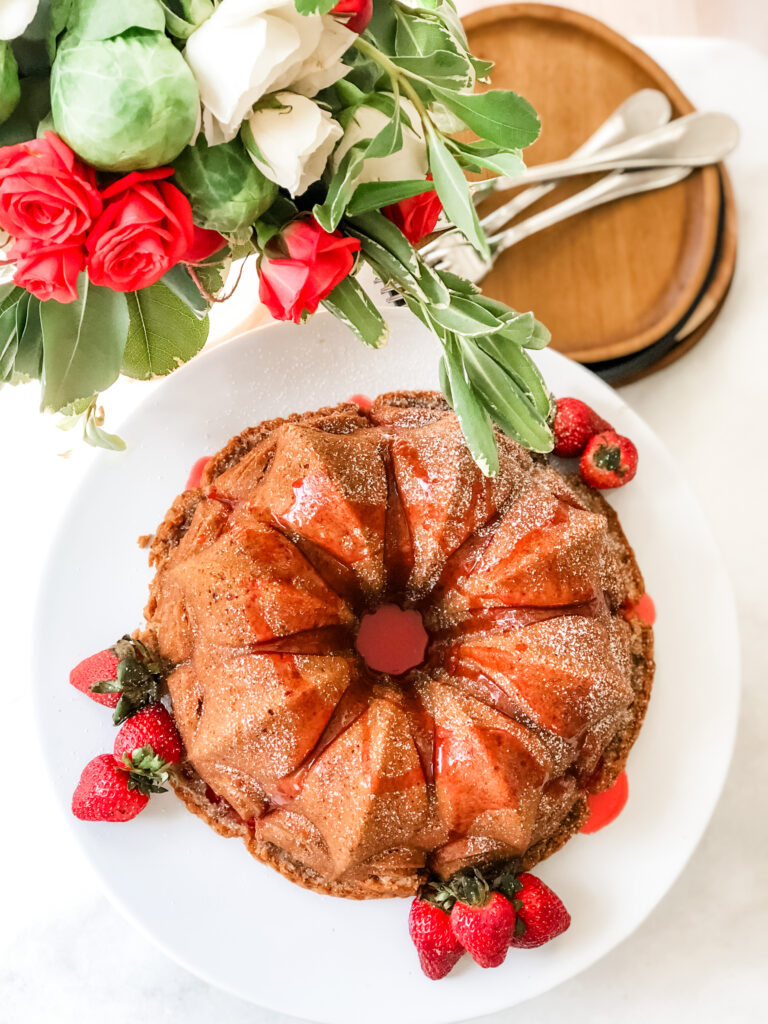
  1. Mini Bundt Cake Mold: Ideal for moms who love to entertain, this mini bundt cake mold is perfect for creating sweet little treats to end a meal when hosting. Pair it with a lovely cake mix from Williams-Sonoma for a thoughtful gift bundle.
  2. Colorful Baking Sheet Set or Gold Baking Sheet Set: Every baker needs a good set of baking sheets, and this set with various sizes and shapes is sure to please. Perfect for baking cookies, pastries, and more, these baking sheets are a kitchen essential. Pair them with a spatula and dish towel for a complete baking kit.
  3. KitchenAid Cordless Hand Mixer: A game-changer for bakers, this cordless hand mixer allows for easy movement around the kitchen and is perfect for taking on the go. Whether whipping up cookies or making whipped cream, this mixer is a must-have for any baking enthusiast mom. I’ve brought mine on vacation with me!
  4. Brownie Baking Pan with Edges Only: For brownie lovers who always want the crispy edge, this brownie baking pan is a dream come true.
  5. Mixing Bowl Set: This nesting mixing bowl set is great for bakers who like to have a variety of bowl sizes on hand for baking projects. Say goodbye to mismatched sets and hello to organized baking with this practical gift. Pair it with a pancake mix and a spatula for a delightful breakfast-themed gift bundle.
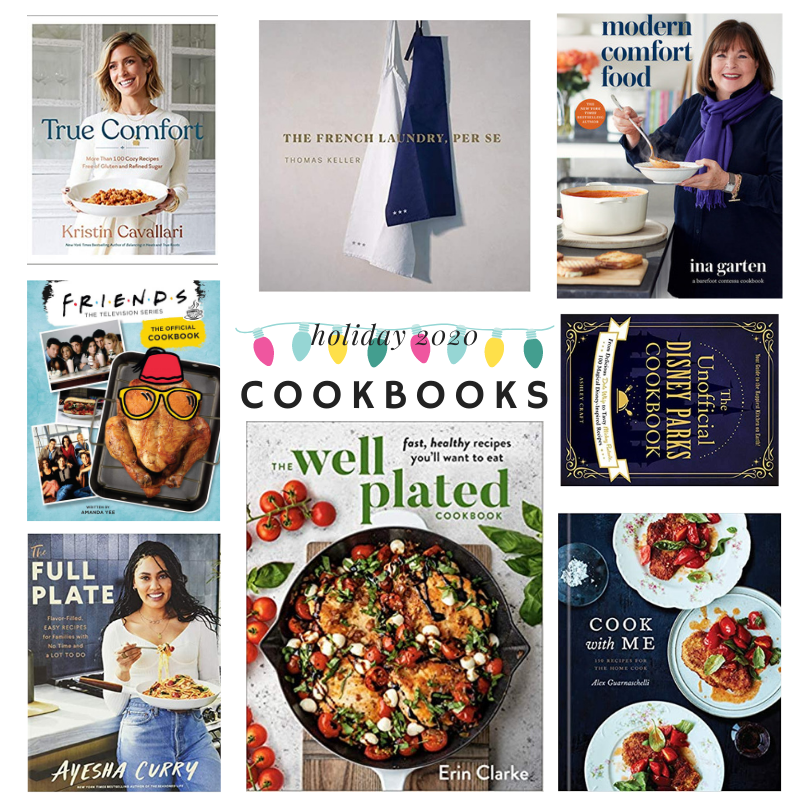
  6. Dessert Person Cookbook: Treat your mom to a dessert baking cookbook from popular chef Claire Saffitz. Filled with mouthwatering recipes and expert tips, this cookbook is sure to inspire countless baking adventures.
  7. Cake and Cupcake Decorating Tips & Set: Kickstart your mom’s cake decorating journey with this comprehensive decorating set. Perfect for creating stunning cakes and cupcakes, this set is a great way to unleash her creativity in the kitchen.

This Mother’s Day, show your appreciation for the baking enthusiast mom in your life with one of these thoughtful gifts. Whether she’s whipping up cookies, cakes, or pastries, these essentials are sure to elevate her baking game and bring joy to her kitchen. Here’s to celebrating the love, memories, and delicious treats that make Mother’s Day extra sweet!

How to Create an After School Snack Cart

Do you ever find yourself struggling to navigate the snack selection in your pantry? Do your kids constantly ask for snacks? Same, friend, same. This is why I decided to create an after-school snack cart for my two toddler girls! I scooped up a cart, some bins, and let me tell you, it’s been a game-changer for our family.

cart filled with snacks

Why a Snack Cart?

The idea for the snack cart came from wanting to give my girls a sense of independence when it comes to choosing their snacks. I wanted them to have easy access to a variety of options while also freeing up cabinet space in our kitchen. With the snack cart, everything is neatly organized and visible, making it easier for the girls to make their selections without any of us having to dig through cabinets.

close up of snack cart filled with snacks
snack cart stocked with snacks

Choosing the Snacks

When selecting snacks for the cart, I focused on items with lower sugar content, aiming for 6 grams or less per serving. This meant prioritizing fruit, such as apple sauce pouches, clementines, and peach fruit cups, as well as healthier alternatives like Teddy Grahams, snack bags of peanut butter-filled pretzels, and Annie’s Homegrown chewy granola bars. I also keep additional fruit, low-fat string cheese, and yogurts in the fridge for added variety.

This week, we stocked up with apple sauce pouches, strawberry apple sauce pouches, clementines, Sun-Maid yogurt covered raisins, mini yogurt raisins (we love them for church and the car) peach cups, Heavenly Hunks, peanut butter filled pretzels, granola bites, Teddy Grahams and Annie’s Homegrown chewy granola bars.

This will last us 2-3 weeks!

hand reaching for clementines

Establishing Rules

To encourage healthy choices, we established some guidelines for the snack cart. Fruit is mostly unlimited, while the other snacks are more controlled, with the girls allowed to choose one per day. This helps them learn about moderation while still enjoying a variety of treats.

hand reaching for snack

Involving the Kids

One of the best parts of the snack cart is involving the girls in the selection process. We go shopping together, and I allow them to pick from a selection of pre-approved options. They love trying new things and are always excited to see what’s in the cart each week. It’s also a great opportunity for them to practice decision-making and explore different flavors and textures.

clementines and apple sauce in snack cart

Benefits for the Family

The snack cart has had numerous benefits for our family. Not only does it give the girls a sense of independence and responsibility, but it also helps my husband and me focus on other tasks, knowing that the girls can easily grab a snack when they’re hungry. It’s especially helpful for us as we work from home, allowing us to stay productive without constant interruptions.

Overall, creating an after-school snack cart has been a game-changer for our family. Not only does it promote independence and healthy choices, but it also streamlines our snack routine and reduces stress for everyone involved. If you’re looking for a simple yet effective way to improve your snack game, I highly recommend giving it a try!

snack cart fully stocked